Showing posts with label Blogger. Show all posts

Make your Blogger Label Attractive and Neat :)

By Pravin Purohit   Posted at  00:47   Blogger 1 comment


What are Labels.

Labels is a thing that is used mostly in blogs for arranging the posts according to its type or category. It is very important to arrange the labels properly and give a perfect label to the post before publishing. Labels are also very usefull to keep visitors a long on the site/blog . Default Blogger Labels are avaiable in two types.
  • Grid
  • List
so , we are today going to change grid style of  bloggger labels using a simple CSS.
So wont you want to have a attractive wordpress like labels to blog.

Add CSS to Blog

To be honest, there is no complexity in this tutorial because all we need to do is to insert a CSS to our Blog, and it would do the job quite effortlessly.
    1. Go to Blogger.com >> Templates >>EDIT HTML >> Proceed.
    2. Now in the theme Search for ]]> .
    3. and above it Paste the Below CSS Coding.
    4. Then Click Publish.
#Label1 a{
line-height:20px;
font-family:Tahoma, Segoe UI;
text-transform:capitalize;
background: whitesmoke;
border: 1px solid #E6E6E6;
font-size:13px!important;
display:inline-block;
-webkit-border-radius: 5px;
-moz-border-radius:2px;
border-radius: 5px;
margin:0 0 5px 0;
padding: 2px 9px;
border-bottom-width: 3px;}
a:link,a:visited,a:active,a:focus{color:#666;
outline:0 none;
text-decoration:none;}
min-height:800px;
color:#5e6066;
background:#f8f9fa
}
 
Congrats you've successfully added stylish WordPress look alike labels to Your Blog.


What if the above code does not work ?


This can be due to code your blogger labels are created with, just follow below steps to see your appropriate code and replace it with above CSS code.
  1. inspect-element-chromeSo what you can do is just right click on your label in chrome browser and you will see something like in the image on the right, it’s the code constructing your labels.
  2. So now just change the above CSS code starting with that code you found and it will work fine.


How This CSS was Made?

  Well I wont make this post longer so I'll tell in short about CSS codes used so that even You can custumize it :)  
  • First to make text in label beautiful & attractive we added fonts Tahoma & Segoe UI to Texts and also made letters capital to look better. line height is for proper padding.
line-height:20px;
font-family:Tahoma, Segoe UI;
text-transform:capitalize;
  • Then for exact color like wordpress labels we added whitesmoke to background & a 1px border around it
background: whitesmoke;
border: 1px solid #E6E6E6;
display:inline-block;
  • We also added a rounded border to make it pretty ;)
-webkit-border-radius: 5px;
-moz-border-radius:2px;
border-radius: 5px;
margin:0 0 5px 0;
padding: 2px 9px;
border-bottom-width: 3px;}
 
  • Lastly to prevent overwriting of original CSS code of bloggers theme we added custom links to tag to prevent it from looking uglier.
a:link,a:visited,a:active,a:focus{color:#666;
outline:0 none;
text decoration:none;}
Thats it ! How a Good Day & Please  do comment if you have any query or suggestions , We L♥ve it :D
Make A Custom Webkit Scrollbar For Your Website or Blog.

By Pravin Purohit   Posted at  03:43   Blogger No comments

Do you want to enhance the Scroll bar of your website? Scroll bar appears at the right side of the screen and, it allows users to scroll down the page whenever they drag there mouse up or down the page. To provide a user-friendly experience to your visitors, it is essential to have a Smooth Scroll bar. However, there is no doubt that Custom Scroll bar does the job quite handsomely, but it is not perfect. Few days ago, our reader informed us about the colorful Webkit Scrollbars that he has seen on different websites. Furthermore, he also requested us to develop a similar one. Therefore, in this article we will learn How to Create Customize Webkit Scrollbar in Blogger BlogSpot Blog?

What is the Definition of WEBKIT Scrollbar?

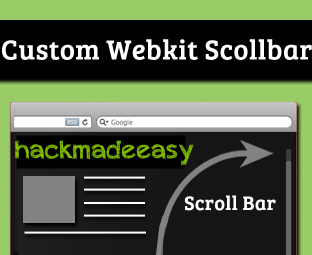
Mostly of the people are still thinking what does the word “WEBKIT Scrollbar” means, it is a vertical or horizontal bar which usually appears at the right side of the screen and that allows users to scroll down the page through their mouse. If anyone is still unable to understand how it works then, don’t forget to check the following demonstration which would clear all the misconception that is wobbling into your brains. Consider the following screenshots.
::-webkit-scrollbar              { /* 1 */ }
::-webkit-scrollbar-button       { /* 2 */ }
::-webkit-scrollbar-track        { /* 3 */ }
::-webkit-scrollbar-track-piece  { /* 4 */ }
::-webkit-scrollbar-thumb        { /* 5 */ }
::-webkit-scrollbar-corner       { /* 6 */ }
::-webkit-resizer                { /* 7 */ }

Why to Use Customized Scrollbar?

There is no lethal reason why a person could say a no to Customized Scrollbar because it adds a new elegant life to his website. Consider that a person has a highly professional website but since, the Scrollbar is from old-school, so it is quite clear that, it will destroy the complete outlook of a website. To learn more about the difference between an ordinary or and a customized scrollbar consider the following screenshot.

How to Add Webkit Scrollbar in Blogger Platform?

To be honest, there is no complexity in this tutorial because all we need to do is to insert a CSS to our theme, and it would do the job quite effortlessly.  To install Webkit Scrollbar in your blogger template consider the following instructions.
  • Go To Blogger.com >> Templates >>EDIT HTML >> Proceed.
  • Now in the theme Search for ]]></b:skin> and above it Paste the Following CSS Coding.

/* --- HackMadeEasy.Blogspot.com CUSTOM WEBKIT gradient SCROLLBAR With Rounded Corners IN BLOGGER BLOG --- */
::-webkit-scrollbar {
background:#fff;
width:10px;
}
::-webkit-scrollbar-thumb {
-webkit-box-shadow: inset 0 0 6px rgba(0, 0, 0, 0.5);
background-image: -webkit-linear-gradient(top, #32A4D6 10%, #32A4D6 51%);
-moz-border-radius:200px;
-webkit-border-radius:200px;
border-radius:200px;}
::-webkit-scrollbar-track {
}
For websites paste above code in your style sheet or add below code above ur
/* --- HackMadeEasy.Blogspot.com CUSTOM WEBKIT gradient SCROLLBAR With Rounded Corners IN BLOGGER BLOG --- */
::-webkit-scrollbar {
background:#fff;
width:10px;
}
::-webkit-scrollbar-thumb {
-webkit-box-shadow: inset 0 0 6px rgba(0, 0, 0, 0.5);
background-image: -webkit-linear-gradient(top, #32A4D6 10%, #32A4D6 51%);
-moz-border-radius:200px;
-webkit-border-radius:200px;
border-radius:200px;}
::-webkit-scrollbar-track {
}


  • Then Replace #32A4D6 with the color that you want to see in the Scrollbar.

  • All Done: After doing all the customization just press the Save button. Now Visit your site and we are sure it wouldn’t let you down. By using the same technique, we can customize many elements of a website.
    It is Always Recommended to Backup Your Template Before Making Any Changes

    ADsense got banned / Disabled? Request Adsense Team To Re-Enable It.

    By Pravin Purohit   Posted at  20:20   Blogger No comments
    For the purpose of  making effective there services at both point of view advertiser and publisher, Google is very strict and serious about there program policy. And hence Google Adsense is the most trusted and higher revenue provider in the world. Many a time is found that many  publisher gets there account disable by mistake or not having enough awareness about Adsense program and policies. Its is but obis that any business in the world will not employee you if you violating rules and regulation of the company. If Adsense account  has been disabled to your website or blog as a result of a policy violation, than this post will surly helpful to you.

    According to Google Adsense team.....
    If ad serving has been disabled to your site as a result of a policy violation, you may request that we re-enable ad serving to your site by submitting our form below. However, please keep in mind that we reserve the right to disable ad serving to a site, and in some cases ad serving will remain permanently disabled.

    Before moving further You must go through following link.
    Now i assumed that you have make changes required to your website or blog. now follow simplest step that mentioned below.
    • Be sure that Before submitting form access to your AdSense login email, update your AdSense login if you have login with other email id. 
    • You are required to fill up the form which is provided by google click on you can directly able to go ti the link just click on [link].
    • Fill up the simple details like Name, Pub-ID, Issue-ID, Address of your blog and reliable reason that changes made in your website and blog.
      (You can find the Issue ID at the bottom of your email notification or you can find it on adsense website under home tab.)
    • That set click on submit button.
    • If you having any further query you can email it to adsense-support@google.com
      That set ! Is this post helpful to you? Feel free to Share your thought, suggestions, Query any thing that you would share with us comment it below. We love it a lot. :)

      Add Meta Tags And Keywords To Blog | Improve SEO.

      By Pravin Purohit   Posted at  07:53   Blogger 2 comments


      Blogger has provided us a way to blog free form from anywhere, anytime on anything. We develop our blog, we design it and start blogging, but sometimes I think blogger really misses out few things that WordPress can give us, the power of SEO but blogger proved us wrong by introducing Search Preferences in blogger free platform a way back, well I do not have any post on what it is if you do not know about it but I have posted about the custom permalink feature that blogger provides everyone.

      Now the another big SEO thing blogger can be tweaked up with is its meta tagging feature or support what ever you call, so now you can add meta tags to optimize your blog and your posts too. So if you wondering how you can add meta tags like description and keywords in individual posts then check out below tutorial.

      Adding Meta Description Officially through Blogger


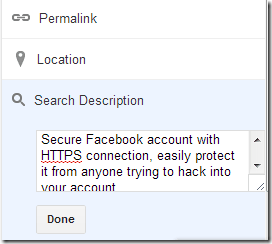
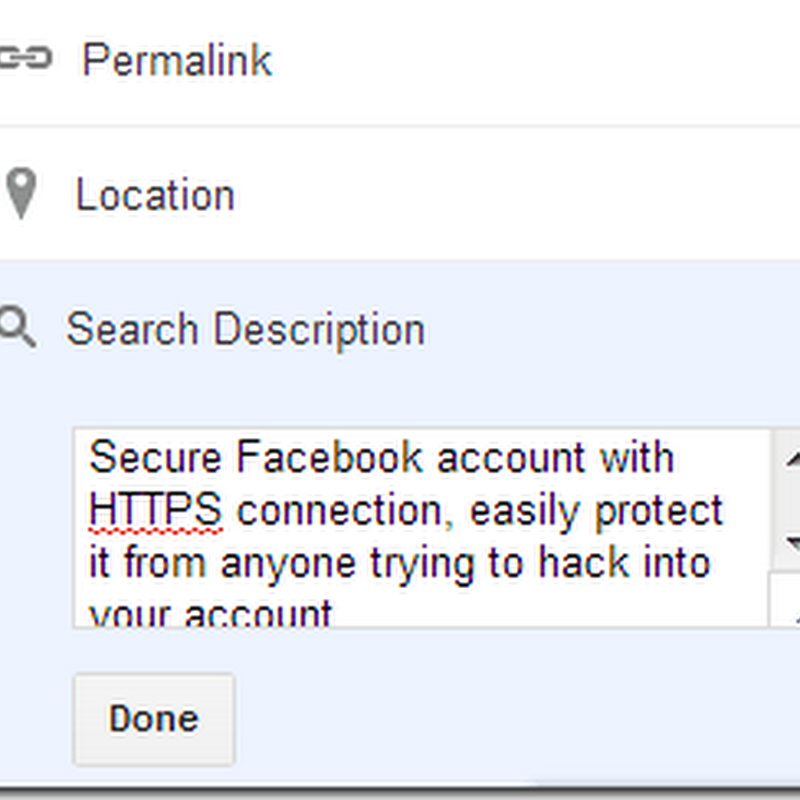
      search-description-postsNow for every individual post you can add separate meta description for it right from its editing dashboard. You just need to write some description lines and it will automatically become its meta tags.
      First of all on Blogger make sure that you can enabled the description option in Search Preferences, go to

      Blogger > Settings > Search Preferences > Description.
      
      Enable description and write down your blogs description.
      Now after enabling this feature you can visit any of you posts or write a new posts and you will see a new Search Description field in your posts editor.
      Just fill it whatever description you want to give to that post.
      That it now Save it and publish your posts, you description will be added as meta tag for that post.
      Now this option does not include any keywords field so if you want to add individual keywords to your post than check about below above step.

      Adding Meta Description & Keywords directly in Edit HTML


      Well now with this step you can easily add description and keywords to your blogger post but with this method you need to add many code for every single post. So its not recommended fro every post but for some certain posts if you think seriously needs to have keywords and description than you can use this method.

      Well we will using the same meta tags used to optimize default blogs homepage but by using some conditional tags you can optimize separate posts.

      Open Blogger > Template > Edit HTML

      Now if you already have meta tags added for your blog than right below those meta tags add these conditional meta tags.

      <b:if cond=’data:blog.url == &quot;http://Post-URL-Here&quot;’>
      <meta content=’Description Here‘ name=’description’/>
      <meta content=’Keywords Here‘ name=’keywords’/></b:if>
      
      Now you need to replace the Post URL with your blog post on which you want to use these meta description and keywords, and change description and keywords too.
      That’s it now if you have more just add the same code below it and change the post URL, now your posts will be optimized with description and keywords.
      So there is no limit you can optimize as many post as you want, so have fun implementing this and improving your search rankings.

      Add Moving Clouds In Background Blogger Using Jquery

      By Pravin Purohit   Posted at  07:54   Blogger 18 comments
      Add Moving Clouds in Background Blogger using jqueryHave a Look at This Image. Its wow? Isn't it? So this is a simple css and jquery trick which makes the background image move. if you'll see the Image is constant. it isnt a gif. its the jquery which make the background move


      Did Amazed with pic? Check


      Steps to Add this to your own Blog / site.

      So Its Very Easy to Add this to you blog


      • Visit Blogger > Dropdown menu > Template > Edit HTML
      • Now Press Ctrl  + f and search for body{ [this is actually starting of your blogs body]
      • And Replace the body{ with the code below
      background:#c1deee url(http://i.imgur.com/JD8mWs7.png) repeat-x scroll top left;
      • Now Your Background Will be seen :) But we need to move the Clouds . ie background image
      • So Add the following code Above
      </head>

      <script src=’http://ajax.googleapis.com/ajax/libs/jquery/1/jquery.min.js’ type=’text/javascript’/>
      <script charset=’utf-8′ type=’text/javascript’>var scrollSpeed=70;var step=1;var current=0;var imageWidth=2247;var headerWidth=800;var restartPosition=-(imageWidth – headerWidth);function scrollBg(){current -=step;if (current==restartPosition){current=0;}$(&#39;body&#39;).css(&quot;background-position&quot;,current+&quot;px 0&quot;);}var init=setInterval(&quot;scrollBg()&quot;, scrollSpeed)</script>

      • Yeah! Hi five your blog now have a animnated background. just remove code highlighted above if you have already included jquery and change speed as you Wish
      Leave a Comment Below if any problem and thanks to the Developer :)

        Back to top ↑
        Connect with Us

          Follow our updates

          Total Pageviews

        Contact us

        Name

        Email *

        Message *

        Like us

        Recent Comments

        © 2011-2013 Hack Made Easy. All rights reserved.